Need help getting the Course ID that you’re looking for? You’ve come to the right place! This comprehensive guide will teach you how to find your Thinkific Course ID easily.
This tutorial is for both new and experienced Thinkific users. It includes a step-by-step guide with screenshots, examples, and tips on keeping track of your Course ID for future reference.
You will also understand the importance of Course IDs and how to find them quickly and easily. By the end of the tutorial, you will already know how to find them and what to do with them whenever you need them for various purposes. Without further ado, let’s get started!
![]()
Before We Begin: What is Thinkific?
Thinkific is the premier platform for creating, marketing, and selling online courses. As a seasoned Thinkific user, I know firsthand how powerful and versatile this platform can be. And I bet you’ve been using this to sell your courses for a few days or weeks.
Thinkific provides a wide range of tools and features to help users, from course creation to student management and analytics. Additionally, it allows the creation of membership sites and subscriptions, providing a steady revenue stream.
You and I both know already that the platform is intuitive and user-friendly. Plus, the Thinkific community is always willing to help! With a little effort and passion, you can create a course that your students will love and will help you achieve your goals.
Thinkific Courses and Course IDs
As a seasoned Thinkific user, one of the most important aspects of creating a course on the platform is understanding how Course IDs work. This section will discuss what Thinkific Course IDs are and how they work.
What are They, and How Are They Generated?
Thinkific Course IDs are unique identifiers assigned to each course you create on the platform. They are used to notify and locate your course within the platform, allowing you to easily access and manage your course and share it with others. Think of the Course ID as a representation of your course. You can use it for linking, customization, and reporting purposes, making it an essential piece of information.
Course IDs are generated automatically by Thinkific every time you create your course. These are typically a string of four, five, or even six numbers, depending on the version of the site when it was made, as well as how you can find them, which I’ll explain in full later in this article. An example of a Thinkific Course ID looks like this: 12345. So, once your course goes live, the Course ID assigned will already occur.

> > Click Here to Start Your Free Trial < <
Purpose of Using Course IDs
You can use Thinkific Course IDs for several purposes within the Thinkific platform. The main purposes for using them are as follows:
- Identification – The Course ID is a helpful way of identifying any course easily within the platform.
- Linking – You can use the Course ID to link the course to other pages, such as landing pages and external checkout links, making it easy to share and promote the course to potential students.
- Enrollment – Using any Course ID would make the enrollment process easier for you and your students.
- Integrations – The Course ID is quite diverse, so you can link it to integrate the course with third-party plugins and platforms, such as Zapier and WooNinja.
- Customization – Regarding integrations, you can utilize the Course IDs manually integrating your course using the Thinkific API tool. Additionally, you can do the same whenever you want to build or customize your theme if you’re looking into refreshing the overall look of what you’re offering using Liquid variables, etc.
- Troubleshooting – In cases of emergency, you can use the Course ID to troubleshoot any issues that may arise with the course, such as technical difficulties or payment processing issues, making it easier to resolve the problem.
- Sharing – You can use the Course ID to share the course with others by providing them with the URL, which makes it easy for them to access the course and enroll.
If you notice some of the purposes listed above, they’re more appropriate for Thinkific developers, who, more often than not, are well-versed in coding and web development. Regardless of the skill difficulty, using Course IDs can be a solid way of making your experience with the online course platform much more efficient and productive. Additionally, these use cases can help you utilize the platform and maximize your revenue.

> > Click Here to Start Your Free Trial < <
Understanding Course IDs vs. Bundle IDs
You can create course bundles and have a unique ID generated for you as you do with standalone courses. It’s important to note that just like courses, Thinkific also assigns Bundle IDs to bundles on the platform. Technically, Bundle IDs function the same way as Course IDs and serve the same purpose.
The only difference that sets one apart from the other is while Course IDs refer to singular courses, Bundle IDs refer to multiple courses grouped into one collection. To better understand, a Thinkific bundle is a collection of multiple courses or products you can offer as part of a package deal. Thinkific allows you to bundle multiple courses and sell them as a package, making it easy to upsell and increase revenue. By using Bundle IDs, you can track the performance of your bundles and monitor how well they are selling.
Just like Course IDs, Bundle IDs are generated automatically by Thinkific. They are typically a string of four, five, or six numbers, depending on which version of the site and which method you would retrieve them.
How To Get Your Course ID: Step-by-step Tutorial
Now that we have a clear idea of what Course IDs are and how they work let’s dive into the step-by-step tutorial on the different ways how to find and easily locate your Course or Bundle ID in Thinkific.
Step 1: Log in to your Thinkific account
The first thing you need to do to identify your Course ID is log in to your Thinkific account. To do so, you’ll need to go to the Thinkific app or website and enter your login credentials, including your email address and password, if you don’t mind. Once you log in, you can go ahead with the next steps. Otherwise, you will need to enter your login information.
> > Click Here to Start Your Free Trial < <
Step 2: Navigate to the course or bundle you want to find the ID for
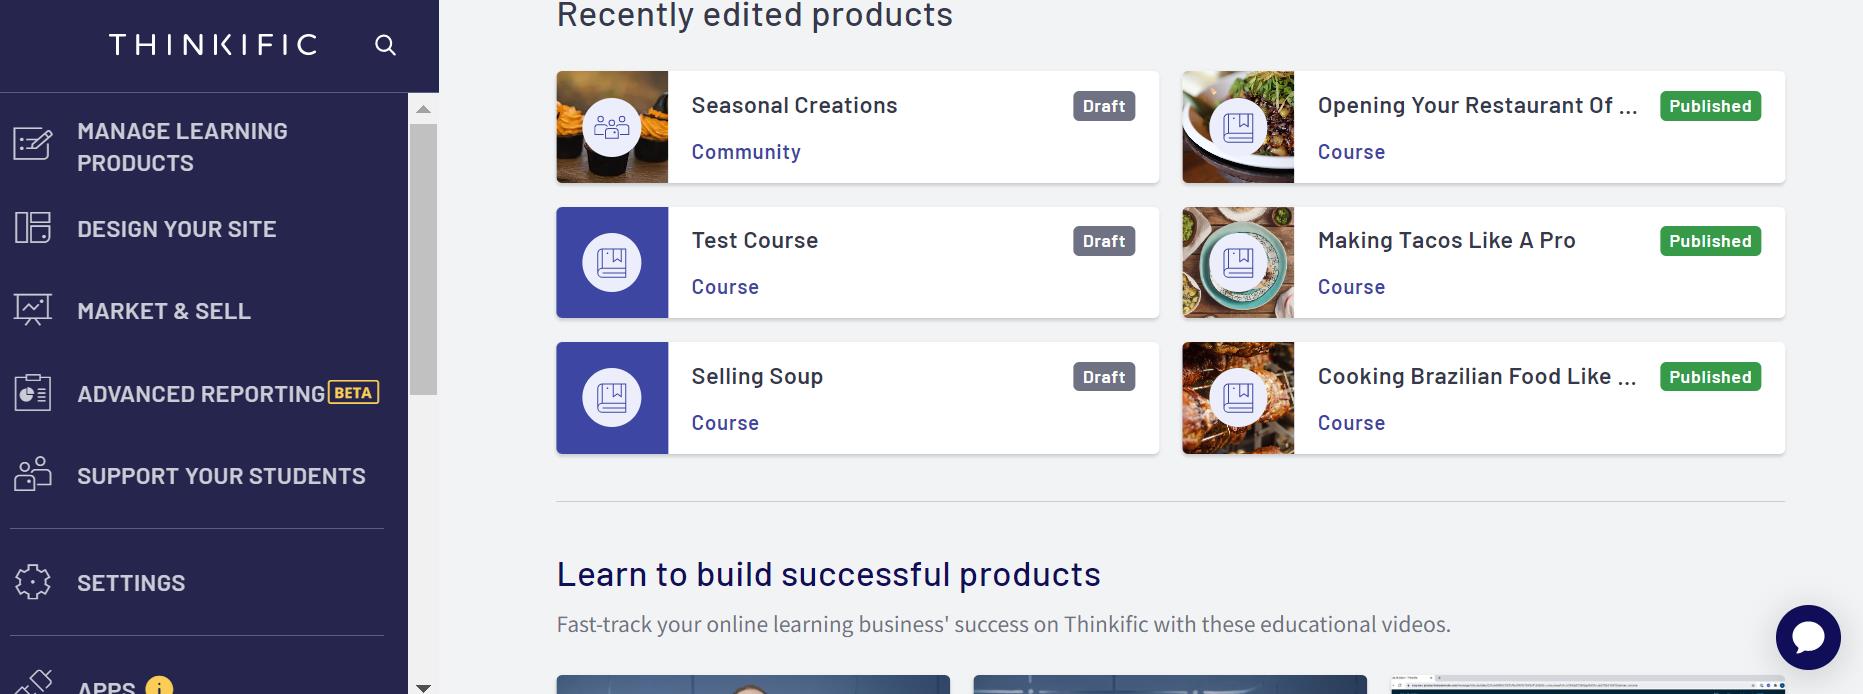
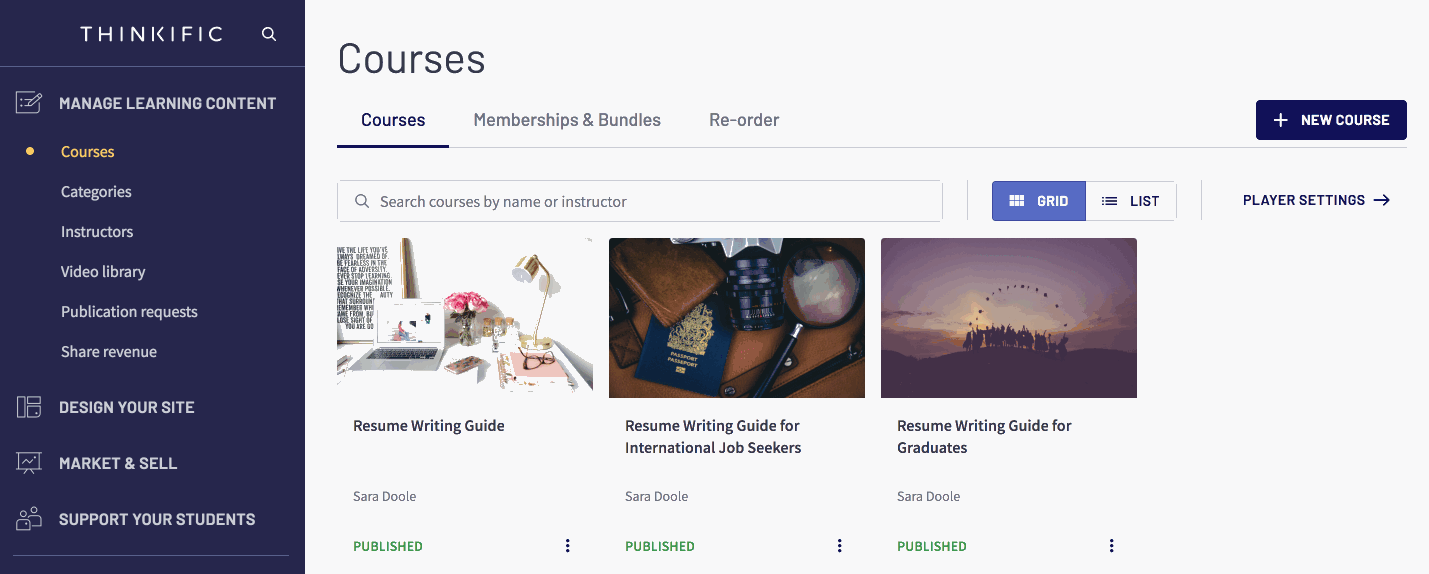
From your account dashboard, click on “Manage Learning Products.” From there, click on “Courses,” then the “Courses” tab, then select your chosen course from the list.
Alternatively, you can also use the search bar at the top of the page. You can start typing the specific bundle or course name you are looking for, and it will show you the product’s name and ID.
> > Click Here to Start Your Free Trial < <
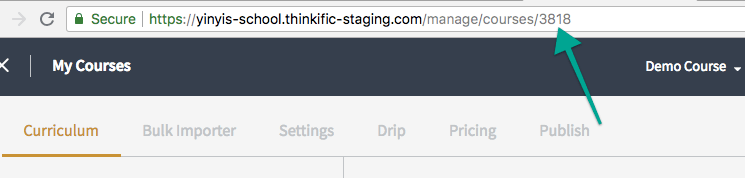
Step 3: Check the URL of your chosen course
You are at a crucial step in finding the ID number. Once you have opened the course, you will find it at the very end of the course’s URL. Down below, it will look like this:
https://myschool.thinkific.com/manage/courses/123456
As you can see, the Course ID for your chosen course should be 123456. Please keep this in mind whenever you want to use it for enrollment or storage-keeping purposes. The same process can be applied to bundles – instead of clicking on the “Courses” tab in step two, you’ll need to choose “Memberships & Bundles” instead.
> > Click Here to Start Your Free Trial < <
It’s that easy! With these three steps, you can easily locate your Course or Bundle ID within the Thinkific platform. Remember that having the ID at your disposal is essential for managing and optimizing your course or bundle on the platform.
You can use it while safe-keeping your spreadsheets, tracking the course’s performance better, and utilizing it for various purposes, from integrations with third-party platforms to advanced customizations. Again, all this makes your experience using Thinkific more efficient and productive.
Product IDs: Not To Be Confused with Course IDs
Before we end this article, I would like to discuss something important that you need to look at. While a Course or Bundle ID in Thinkific may refer to singular courses or multiple courses bundled into singular offerings, Product IDs refer to those courses or bundles sold as actual products.
Thinkific Product IDs are usually assigned to courses and bundles that have already been available for purchase by students all over the world. Product IDs can also apply to membership and subscription services. Considering the wider range of products for sale, it makes sense for Thinkific to assign every one of them to one unifying identity.
How To Get Your Product ID
The mechanics of finding your Product ID remains similar to that of Course IDs or Bundle IDs. Like the other two, Product IDs come in a string of (mostly) five numbers. You can easily find them within the URL.
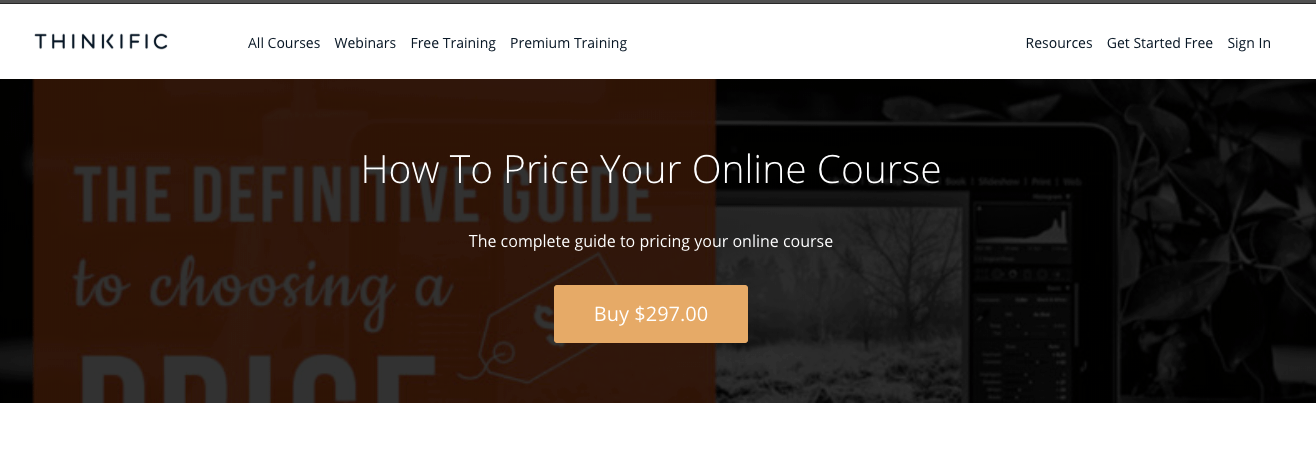
You can find your Thinkific Product ID by going to the “Courses” or “Bundles” tab in the “Manage Learning Products” section of your Thinkific admin dashboard. From there, you will see a list of all of your products. Each product will have its unique Product ID; to get it back, you can just hover over your preferred course until you find the share icon. Click on it, then select “Copy Link” to copy and paste the URL that leads to its landing page onto the search tab.
> > Click Here to Start Your Free Trial < <
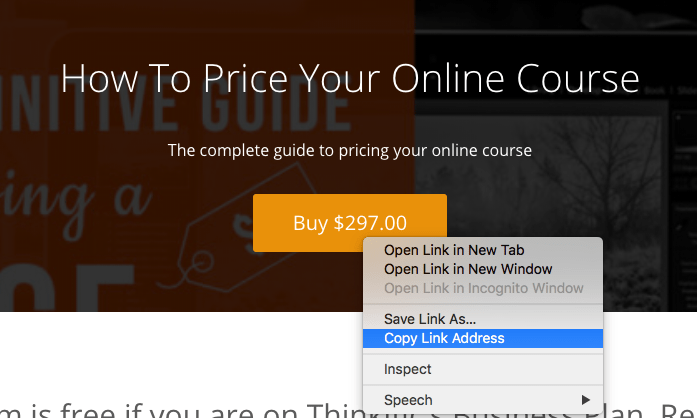
While you paste the landing page URL, make sure you do it on a private or incognito window/tab of the browser that you use. You may also need to log out of your Thinkific account. If you don’t do it, it may redirect you to the course editor within the dashboard. Once you make it to the landing page, all you need to do at this point is right-click on the orange “Buy” button, then from the menu, choose “Copy Link Address.”
> > Click Here to Start Your Free Trial < <
Once copied, you can paste the link to the search bar, where you’ll find your Product ID. By default, it will look like this:
https://training.thinkific.com/enroll/12345
Or, if you use your custom domain instead of the Thinkific.com domain, the URL will look like this:
https://www.myschool.com/enroll/12345
With your Product ID now ready, you can use it to integrate with external checkouts. You can also use it when you connect with Zapier and other third-party apps like Course IDs or Bundle IDs.
Getting Thinkific Course IDs: A Summary
Now that we have already discussed Thinkific Course and Bundle IDs and how to use them, I hope this article has helped you understand more about this unique asset. Having the ID at your disposal is essential for managing and optimizing your products on this platform. To help you make the most out of your experience with Thinkific, please keep a record of your course IDs in a safe place, such as a spreadsheet, for easy reference and future use.
Also, I hope you keep me informed while shedding light on the difference between Course IDs and Product IDs. I know these two may dizzy you up a bit, but I’m glad you could finally steer away from the confusion through this article!
With the knowledge you’ve gained in this article, I hope you can take your course and bundle management to the next level. And remember, if you need further assistance, please don’t hesitate to contact the Thinkific support team!